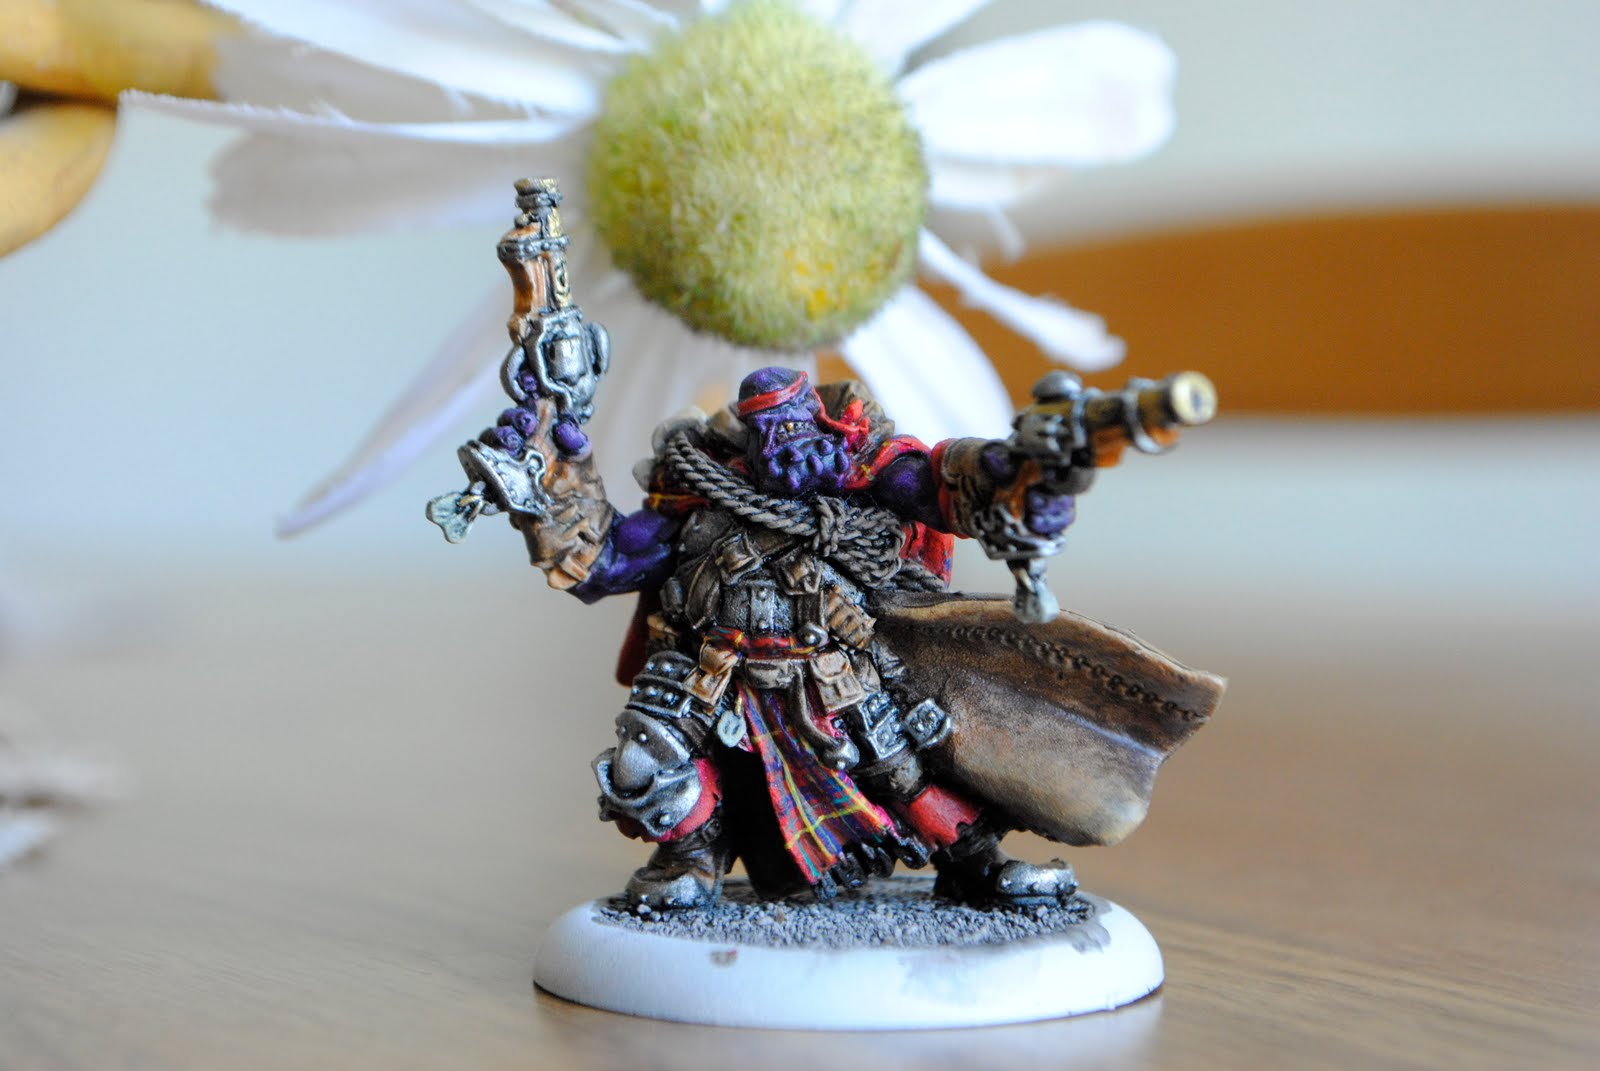
Details


Details
 Leather has got to be my favorite thing to paint. It is quick and easy to make it look fabulous. To see what the leather looked like previous to the first step here, just look at any of the previous "Jarl" posts. First I mixed some mixing medium and water with bloodtracker brown. I applied this on all areas except in the deeper crevices, blending it in a bit as I went along. I should note that I used some straight paint to get the richer color and then used the mixture to blend it.
 Next I used umberal umber to blend the darker areas. this is the same color that I used to do the original wash.
 And then I dry brush blended on some Rucksack Tan. What is drybrush blending? It is a term I made up. Basically you use a flat tipped brush and load it with paint. Wipe some of it off, so it has quite a bit more paint on it than if you were drybrushing. Have a fat, wet brush nearby to blend.
  I got some of the lighter paints in the stitching area. So I used a tiny bit of umbral umber mixed with the mixing medium to do a little wash in there. Using my finger I quickly wiped off the excess while the wash was still wet, this removed the dark wash from the raised areas, while leaving it in the cracks.
 So I haven't reached my goal of painting for one hour each day, but at least I painted for one hour last week. I just worked on some details such as the ropes, the jug, boots and most likely some other things that I can't remember right now.
I didn’t do any painting on Thursday, but I painted for more than 2 hours yesterday. I am not going to post every step in detail because it takes way too long to upload all of the pictures and it interferes with my work to stop and take pictures every few minutes. Here is Jarl before I started painting
It was easy to complete the armor. First I applied a coat of “Pig Iron” Next I did a wash with pure “Armor Wash”( I want the armor to be shiny) third I dry brushed some “Quick Silver” and lastly I dry brushed some highlights on with “quick silver” mixed with “Glorious Gold”.


before after


before after
Not that I am really good at painting small straight lines, but I’ll give you some tips that help. First and foremost keep an eraser near by. The eraser should be a small wet brush with semi-stiff bristles, I use my old worn out dry brushing brush. as soon as you make a mistake rub the wet paint with the eraser brush, you need to be quick since the tiny amount of paint will dry fast. A good quality detail brush is crucial. The other thing that helps, or maybe hurts is having a high resolution camera, or a good magnifying glass. After taking pictures I zoomed in and found that the plaid looked crappy. That’s why I say maybe it hurts. So I spent another half hour touching up the plaid. It still looks far from perfect, but I don’t think anyone will be inspecting it with a magnifying glass.


Step 3:
I added some black and mixing medium to the purple and did a little wash.


Step 7:
So next I did what I’ll call a wet/dry brush. Using a flat tipped brush loaded with just enough paint to go on smoothly, I lightly brush the figure. Sorry this picture is a little fuzzy because it is a dark cloudy day, my camera does not have a super low f stop, I don’t want a ton of grain in the picture produced by a high ISO and I have no tri pod to stabilize the slower shutter speed.


When the skin was done I did a little detail work on the mouth, adding a golden tooth for fun! Don’t worry, I plan on doing the rocks on his skin a different color, I just haven’t decided what color to paint them yet.

 The first step I do after priming is a wash. In the beginning I used black, to bring out the details and make sure all of the nooks and crannies were dark. I later discovered that I could bring out the details and darken the cracks while at the same time getting down the basic color scheme to make sure it was going to work. Since the paint is watered down so much it is easy to change my mind about the colors at this point if they are not looking good on the figure. I think Jarl's basic color scheme is looking good so far. I love using the P3 mixing medium along with water when doing this first wash, because it really makes a difference in how well the color stays in the cracks. Without the mixing medium the wash will dry with air bubbles and other undesirable effects, leaving some of the regions of the model that you want in dark shadow white.
 I prefer to use white primer over black. Most painters prime in black. I like white because I can see the details more clearly, and the colors look lighter and brighter on the finished figure.
Dang. . . I missed a spot behind his boot while I was filing.

Ahhh. . . That's better. Now he really is ready for some paint.

I gathered the sand and glued it on to the base, carefully avoiding the areas that his feet were to be. After finishing all the gluing and painting, I set to painting the edge of the base. While doing so I noticed that the edge was very rough, it needed some serious filing.


This guy was great to paint. I ran in to some challenges, the hardest one was trying to make the purple runes "glow", especially the ones on the club(the club still doesn't look as good as I wanted it, but it's close). Another challenge was filling in ALL of the cracks and divits and such (I'm still not sure if I got all of them). Mulg is one rocky dude.

If you enlarge the picture of the club on the left, you can see some spots I missed. Arg!


P.S. He is not on his real base. I usually glue the figures I paint on a temporary base While painting them. I can handle them better that way. Large models like this are difficult to hold while painting because they are so heavy, my fingers get tired. I painted the club last because it was easy to maneuver the troll around with it while I painted the rest.